This content is adapted from a talk I delivered at Microsoft’s Azure Developers Python Day 2024 on December 5th. At Quansight, our mission is to support the Python open source ecosystem by collaborating with and hiring the maintainers and contributors behind widely used tools like Jupyter, NumPy, and pandas. In this article, I demonstrate how easy it is to install your own AI platform on Azure using open source tools.
I love building tools that help people get work done. Having been involved in the Python open source community since 2008, I started using Python before the cloud even existed. I’ve been in research for a long time and have spent about six years in the industry.
Jupyter is currently the primary integrated development environment (IDE) for research, data science, and AI. If you want to do serious coding, you might switch to VS Code, but for experimenting, Jupyter is where you want to be. There are many great ways to use Jupyter in the cloud with Azure. A quick Google search shows options like Codespaces, Azure Data Studio, ML Studio, and SaaS platforms like Saturn Cloud, Data Layer, Coiled, Databricks, Domino Data Lab, and others. All of these provide one-click access to Jupyter notebooks in the cloud. Or, you can install everything yourself. Let’s focus on that last option today.
Specifically, we’re talking about JupyterHub. Why would an organization want to roll its own Jupyter platform? Here are some things we’ve heard from clients at Quansight. We’re a consulting company, and we work with a lot of different organizations. For example, clients typically don’t want vendor lock-in. Sometimes, the platforms out there don’t align well with their specific needs, or they need to integrate with other internal tools. Security and privacy concerns often come up. And then there’s cost—some platforms can be pretty expensive beyond basic cloud costs.

Why an organization might want to roll its own Jupyter platform:
If you decide to roll your own, there are challenges. At Quansight, we started building tools for this because we were helping clients solve hard problems in machine learning, build new algorithms, or analyze their data. However, every time we went in, they didn’t have a good way to handle Python, or they didn’t have scalable compute, and they couldn’t work with large datasets. They needed Jupyter and scalable tools like Dask and Ray in the cloud, but they didn’t have them.
JupyterHub turned out to be a great open source framework for deploying collaborative Jupyter environments. It’s very flexible and can be installed on many platforms, from High Performance Computing (HPC) systems to Kubernetes. It even has instructions for setting it up on Azure. The documentation is excellent, but it assumes you know Kubernetes and how to set everything up, which many don’t. If you’re a good DevOps person, you should be able to work your way through the instructions, but getting to a production-ready system will take time and effort.
Once you install JupyterHub, you may need something to help you manage your Python environments. How do you manage all the things you need? People want better collaboration tools, monitoring, logging, single sign-on, access controls, MLOps tooling, workflow tooling, and more. Suddenly, you’re not just deploying JupyterHub—you’re deploying an entire suite of tools.
Then you have to decide: Should I use MLflow or something else? Should I use Argo or Prefect? You may end up in a state of paralysis, figuring out what to deploy, how to integrate everything, and how to make it all work together.
Most organizational IT departments are not equipped to handle rapidly changing Python environments. Using AI/ML effectively necessitates managing rapidly changing Python software environments. The solution that most organizations come up with is to use containers, but that’s not the full solution. Containers ignore a whole bunch of challenges and can create roadblocks within organizations.
What we’ve observed is that most container-based platforms assume the containers will remain fairly static. However, researchers, data scientists, and engineers solving real problems in organizations are constantly updating their Python environments—often multiple times a day. That process—getting what a data scientist needs deployed into the platform—introduces a lot of friction. In some organizations, it takes six months or more to update to the latest version of something like pandas.
At one large bank—which I won’t name—it took them a year to update the pandas version in their container. These kinds of issues are what we started running into as well. Can you relate?
When you start thinking about it, you’re no longer just deploying Jupyter or JupyterHub—you’re deploying an entire data science platform, which can be overwhelming. Smaller organizations often throw their hands up thinking this is way too complicated. Larger organizations, on the other hand, have IT departments that are more accustomed to deploying something like Oracle—or some other stable, unchanging systems; they can also get overwhelmed by all the different pieces that need to fit together.
I came from government research labs, where we had access to big HPC systems and could use a lot of compute. When I moved to the industry lab, I found it incredibly frustrating how difficult it was to deploy everything I needed in the cloud. The inspiration for some of the work I’m talking about today came from an early project at the beginning of Amazon Web Services (AWS) called StarCluster, which was developed at MIT. Essentially, you added some environment variables and credentials, run it, and it would handle everything—launching Amazon Elastic Compute Cloud (EC2) instances, setting them up, and dropping you into a Linux desktop with all your tools installed. You didn’t need to know how to use the cloud, but you could still take advantage of it.
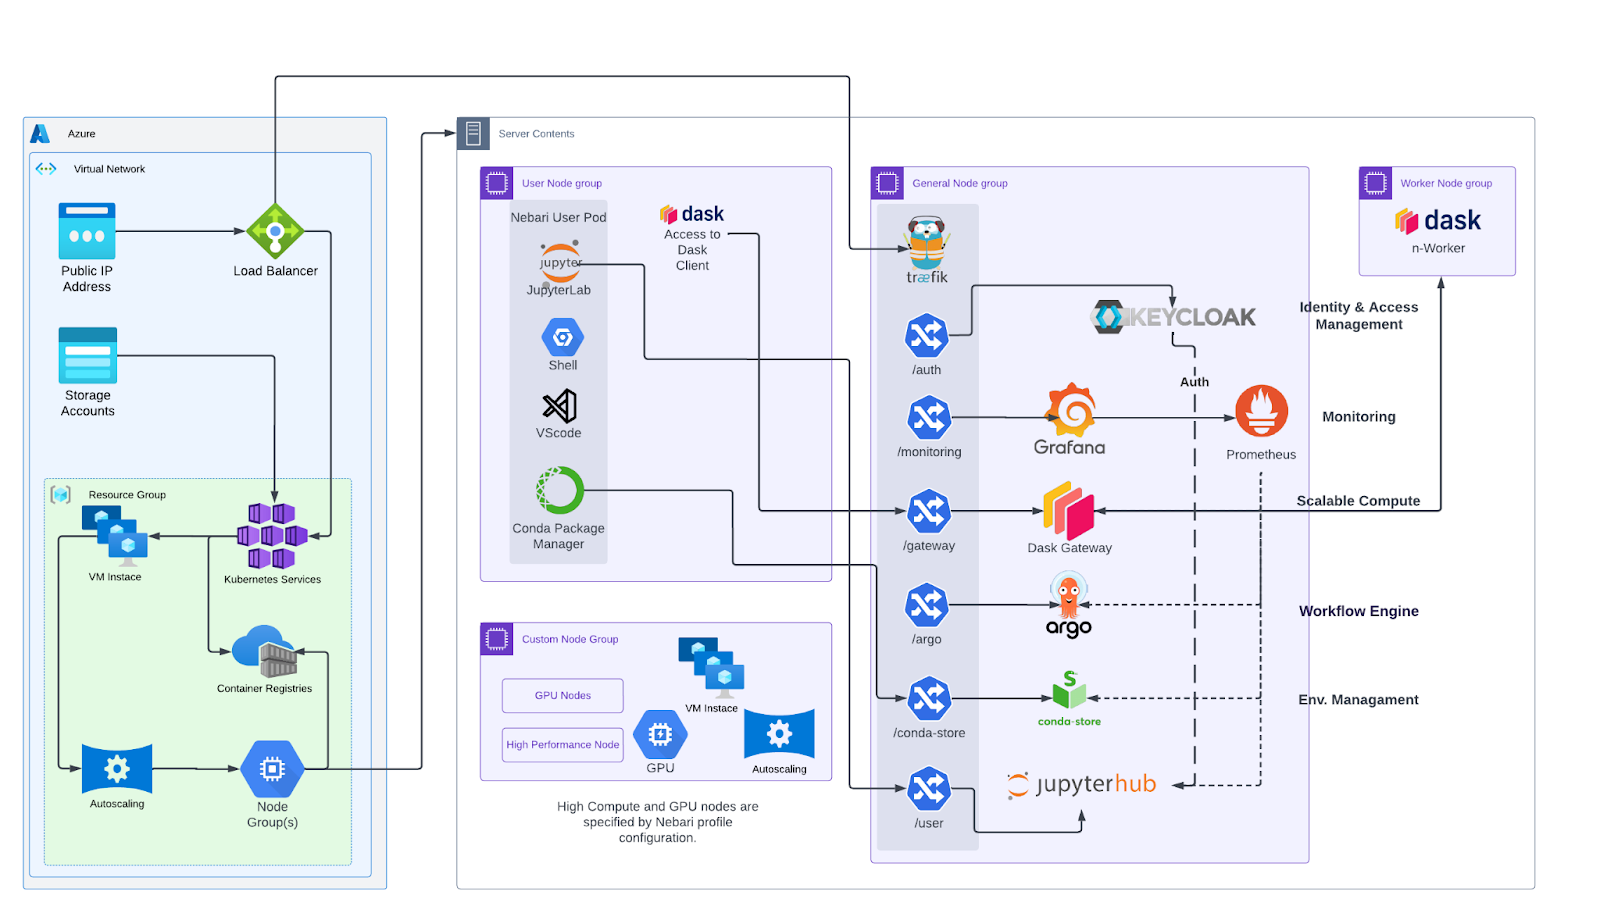
That concept inspired what we started building: an open source platform called Nebari. The way to think about Nebari is as an opinionated distribution of JupyterHub. It takes all the pieces you need for a data science platform, and we’ve made decisions for you. For example, we’ve decided that MLflow is a solid choice, so we include it. Nebari comes with a set of opinions “baked in,” but it’s also a reference architecture and plug-in-based. You can swap out components if you want, but if you don’t have any strong opinions, we provide something that works well out of the box.
And, Nebari can be deployed on Azure in about 30 minutes. It’s built as infrastructure as code, and we test it on Azure weekly. We use automated Continuous integration (CI) to ensure deployments work consistently because things in the cloud change—Kubernetes versions, dependencies, etc. Testing is crucial to make sure it keeps working as expected.
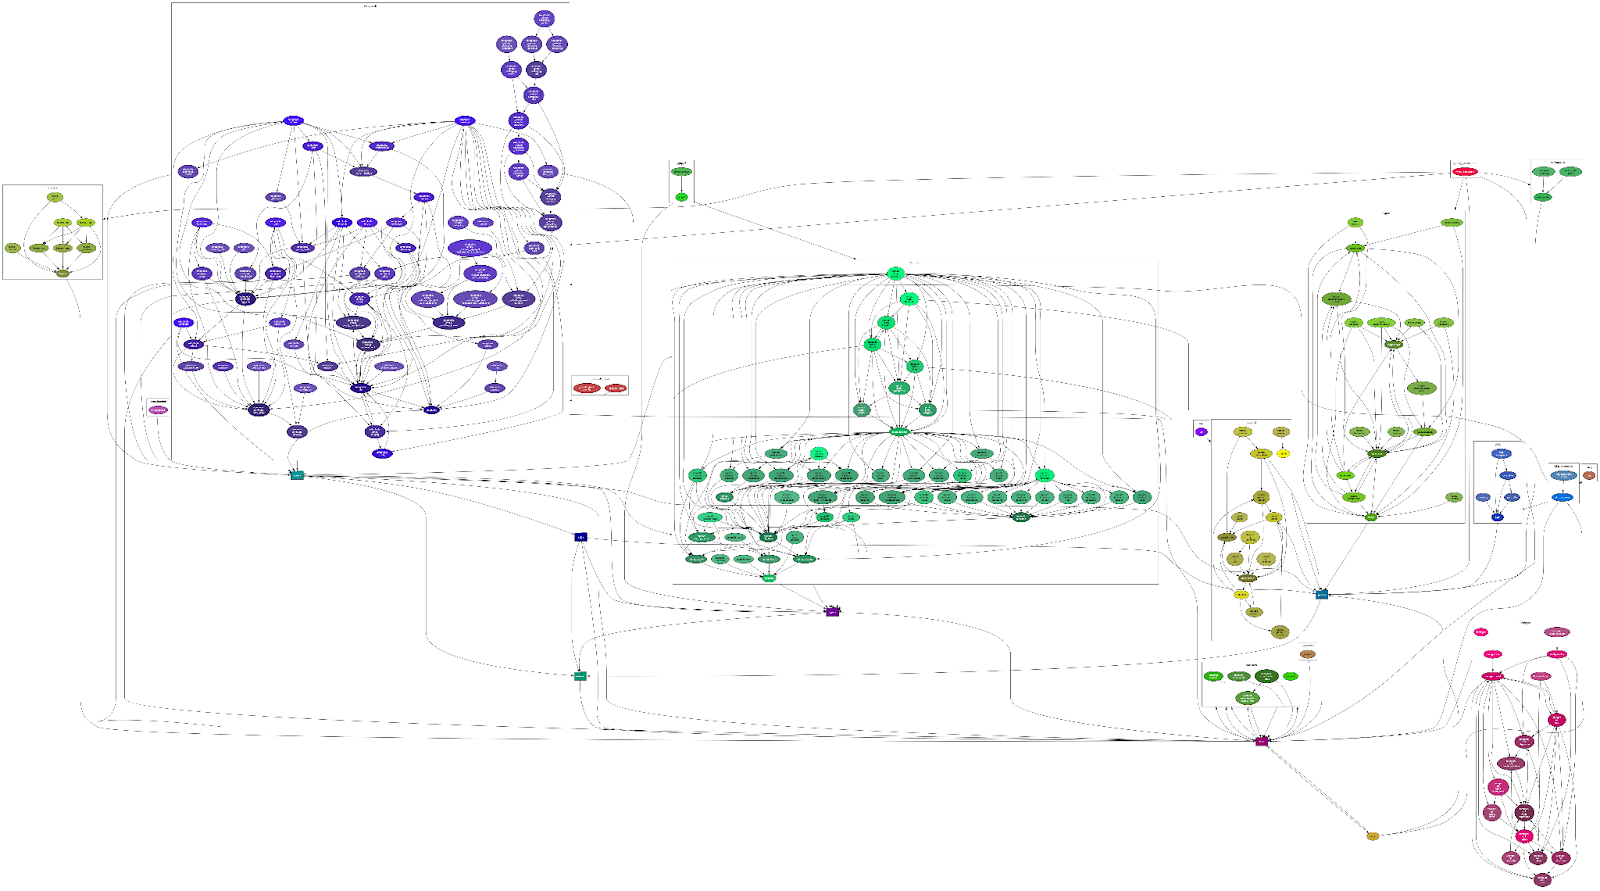
Nebari is built entirely from open source components and frameworks. Technically, you could build it yourself from scratch, but it would take a lot of time to get all the integrations working smoothly.
In our experience, we typically see 2-3 main groups who use Nebari the most. First, smaller organizations that lack cloud or Kubernetes expertise can install, use, and maintain Nebari without much trouble. Second, larger enterprises with robust Kubernetes teams but less familiarity with Python tooling or data science tools also benefit from using it. Additionally, we’ve seen a lot of universities adopt it, mainly for teaching.
Who
Why
Smaller Organizations…
…Who lack cloud or Kubernetes expertise but can install, use, and maintain Nebari easily.
Larger Enterprises…
…Who have robust Kubernetes teams but are less familiar with Python or data science tools.
Universities…
…Who use Nebari mainly for teaching purposes, providing a collaborative platform for students and educators.
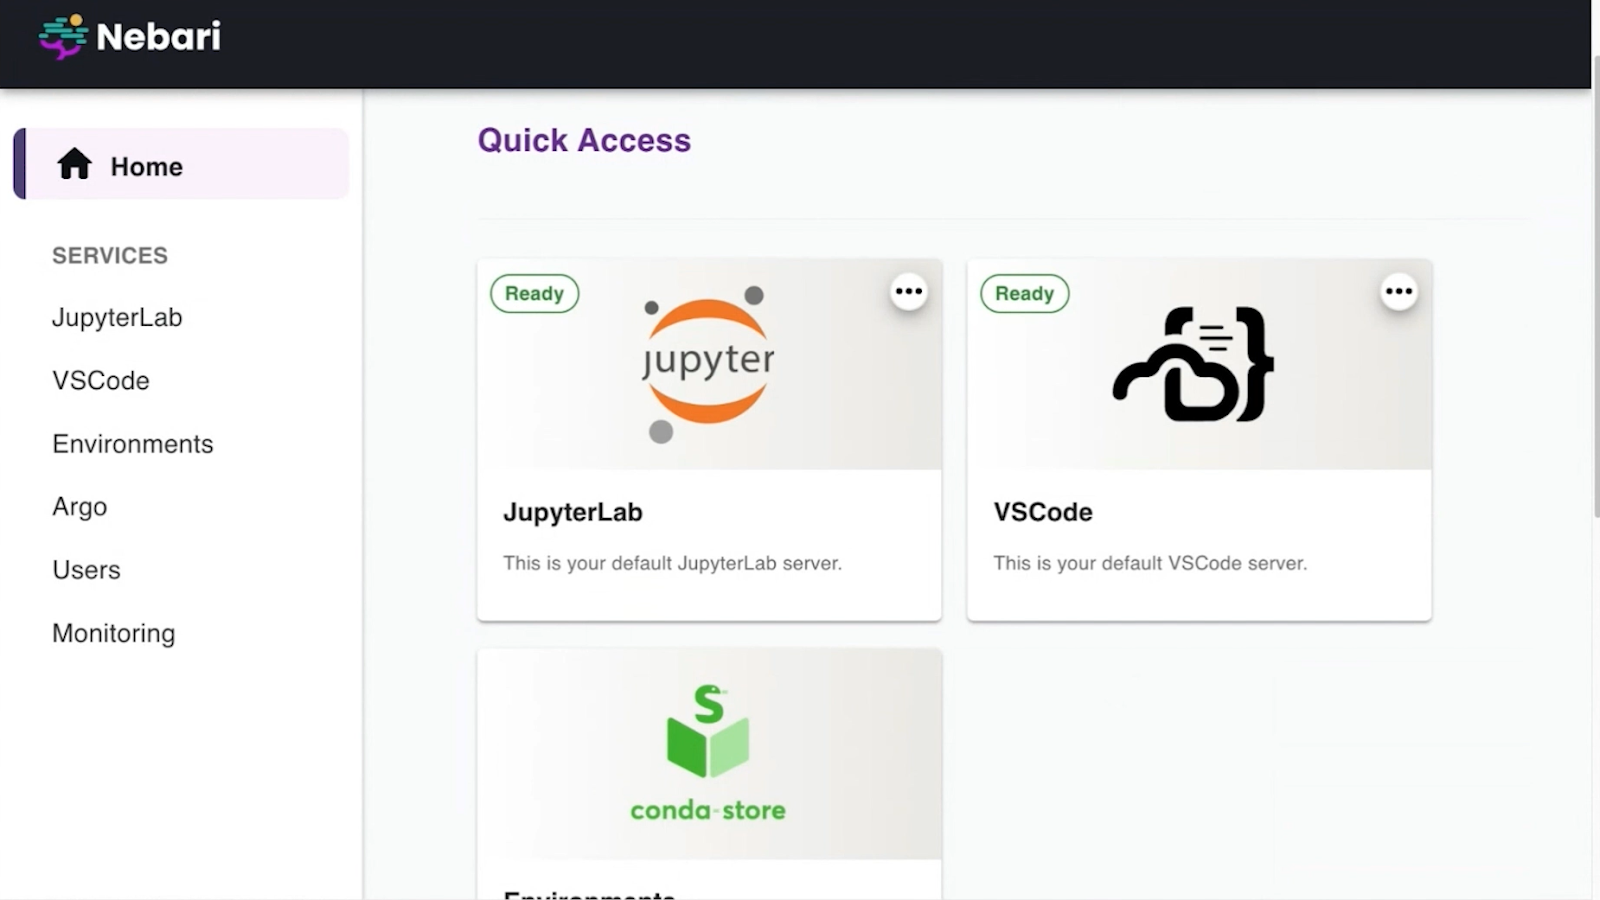
In the video of my talk, I jump into a quick live demo to show you some of the features and tools we provide. See the demo here: LINK TO VIDEO AT START OF DEMO
Here’s a bulleted list of the features mentioned in the demo:
I’m not going to go into all the details—there’s autoscaling and various tools—but at a high level, Nebari supports a DevOps-for-non-DevOps-people approach. This is similar to the concept I mentioned earlier with StarCluster. Ideally, if we’ve done our job right, you should be able to grab your Azure credentials, deploy Nebari, and maintain it without needing to know much about the cloud.
The process starts with a YAML configuration file. From there, Nebari uses the YAML file to create Terraform stages, which ultimately deploy the platform. At its core, Nebari has two main commands:
nebari init – This initializes your basic YAML configuration file.nebari deploy – This takes the YAML file, validates it, renders it into Terraform deployment scripts, and pushes everything to Azure.Let’s go through the details for an Azure Setup.
Step 1: First, you’ll set up a service principal in Azure. This involves creating an app, generating a Client Secret for the app, and granting the Service Principal permissions to manage resources in your Azure subscription.
Step 2: Next, locally, you’ll install Nebari on your laptop. It’s a pure Python package, so you can install it with pip, conda, or another Python package manager.
Step 3: After installation, you’ll do a bit of local setup. Start by creating a folder and running the guided initialization (nebari init).
Step 4: This small wizard runs in the command line and asks you a series of questions, such as where you’re deploying, what secrets and environment variables to use, which zone to deploy in, the project name, and so on.
Step 5: At the end of the guided-init, Nebari will generate a configuration file. This file is pre-populated with default instance sizes, node groups, and other settings. You might need to modify it, especially if you’re including GPU nodes or other specialized configurations. The guided-init also lets you pick and choose which services to deploy—like MLflow or other tools.
Step 6: Once you’ve finalized the configuration file, all you need to do is run nebari deploy with that file. Then, you wait about 30 minutes while a lot of messages stream past. When it’s done, you’ll have a fully functional data science platform that your organization can use in the cloud.

We recommend storing the configuration file in a GitHub or GitLab repository. For ongoing maintenance, you can make changes to the configuration through pull requests. When a pull request is merged, the platform automatically redeploys via Terraform using GitHub Actions or GitLab Runners.
The goal is to make this process simple: you have a clearly defined configuration that can be deployed with a single command. Long-term maintenance involves only updating and managing the YAML file. This approach reduces both the initial deployment cost and the long-term maintenance cost of the platform. And, ideally, you shouldn’t need to know anything about Kubernetes.
Now, let’s talk about some specific adjustments we had to make for Azure. Essentially, Nebari can deploy on any Kubernetes platform, but each cloud provider comes with its own quirks, and Azure is no exception.
One issue we encountered is that storage account names in Azure must be globally unique. Typically, when people deploy the platform, they name the project “Nebari.” However, this can conflict with other projects also named “Nebari,” due to the global uniqueness requirement. To address this, we add a small random postfix to the storage account names to avoid naming conflicts.
Another useful feature we implemented is using Azure Workflow Identity to map Kubernetes service accounts to managed identities. This allows us to inject credentials easily. For example, if MLflow needs to access blob storage, this mapping provides a straightforward way to handle it securely.
Over time, we’ve incorporated numerous bug fixes, security updates, and Azure-specific optimizations into the codebase. This ongoing work is one of the reasons we test Nebari on Azure weekly. Regular testing helps us identify and resolve issues, such as security vulnerabilities, updates to Docker images, and other cloud-specific changes.
If you want to try this yourself, visit our website, where we have a step-by-step guide for deploying Nebari on Azure (FYI, Nebari is also compatible with other clouds). Ideally, you should just need to copy your Azure credentials, sign up for any necessary services, and follow the instructions. If you encounter any issues, let us know on GitHub. We’ll fix the documentation because the goal is that you shouldn’t need to be a cloud developer to deploy Nebari.
If you have questions about deploying or maintaining Jupyter or JupyterHub systems, or if you’re interested in trying out Nebari for your organization, feel free to reach out. We’ve spent a lot of time figuring out how to make these tools easier to use and maintain. Whether it’s scaling, integrations, or just getting started, let us know—we’re here to help.